Hey there, steak lovers! I’m a 30-year-old American homemaker, and I know a thing or two about cooking up the perfect steak. Trust me, there’s nothing quite like sinking your teeth into a juicy, flavorful, and tender piece of meat. The secret to a mind-blowing steak? It’s all in the details!
But don’t worry, I’ve got you covered. I’ll walk you through my 10 easy steps to cook the most amazing steak you’ve ever tasted. These tips will make you a pro in no time, and you’ll be impressing your friends and family with your culinary skills. So grab your apron, your favorite knife, and let’s get started on our journey to steak heaven!
Whether you’re a steak connoisseur or a newbie, this guide will help you perfect your skills and achieve a fabulous meal every time. Remember, practice makes perfect, so don’t be afraid to experiment and find the recipe that works best for you. Let’s get cooking!
Step 1: Choose Your Steak
Alright, This might seem simple, but trust me, it makes a big difference! First, let’s talk cuts. Some popular ones are ribeye, filet, and T-bone, each with its unique flavor and texture. Ribeyes are super juicy, while filets are tender, and T-bones offer a bit of both worlds.
Next, you’ve got your beef grades – Prime, Choice, and Select. Prime is top-notch with the most marbling, which means more flavor and tenderness. Choice is still great, but with a bit less marbling. Select? Well, it’s not terrible, but if you can, go for Prime or Choice.
Here are some tips to pick an awesome piece of meat:
- Look for even marbling – those little white streaks of fat add flavor and keep your steak tender.
- Pay attention to thickness – aim for at least an inch thick. Thicker steaks are easier to cook to your desired doneness without overcooking.
- Make friends with your butcher – they’re a wealth of knowledge and can help you find the best cuts!
So, remember, when choosing your steak, it’s all about the cut, the grade, and some helpful tips to make sure you’re starting off on the right foot.
Step 2: Bring the Steak to Room Temperature
Now, You might be thinking, “Why bother?” But trust me, this step is crucial! Here’s the deal: when your steak is at room temp, it’ll cook more evenly. Cold meat takes longer to cook on the inside, which can lead to an overcooked outside and an undercooked center. Yikes!
So, how long should you let your steak rest? About 30 minutes should do the trick. It’s the perfect time to prep your sides, set the table, or just chill out. But hey, if you forget and it sits for a little longer, don’t sweat it. We’re all human!
A quick safety note: don’t leave your steak out for more than two hours. Bacteria can grow, and that’s not what we’re going for.
To sum it up, bringing your steak to room temperature is key for an evenly cooked, delicious meal. Take your time, relax, and let your meat rest a bit. Your taste buds will thank you later!
Step 3: Prepping Your Steak
Alright, your steak’s been resting, so let’s get to prepping! First, grab some paper towels and pat that steak dry. Why? A dry surface means a better sear, and that’s what we’re after. Next up: seasoning. Salt and pepper are your best friends here. Don’t be shy, but don’t go overboard either. A nice even sprinkle on both sides should do.
Feeling fancy? Toss in some garlic powder, onion powder, or even a pinch of paprika. The sky’s the limit! Just remember, the star of the show is the steak, so don’t overshadow it with too many spices. And that’s it! Your steak is prepped and ready for cooking. Easy, right?
Step 4: Choose Your Cooking Method
Now, it’s time to pick a cooking method. There are loads of ways to cook a steak, but we’ll cover three popular ones: grilling, pan-searing, and oven broiling.
Grilling is classic, perfect for outdoor cookouts, and gives your steak those lovely grill marks. The downside? Weather might not always cooperate, and it can be trickier to control the heat.
Pan-searing is fab for a juicy, tender steak with a nice crust. It’s quick, easy, and you can do it indoors. The catch? Your kitchen might get a bit smoky, so crank up that exhaust fan.
Oven broiling is a solid option if you don’t have a grill or prefer less mess. Pop your steak in the oven, and you’re good to go! Keep an eye on it, though—ovens can be sneaky, and overcooking can happen fast.
Each method has its pros and cons, so think about what works best for you. No matter the method, a delicious steak is within reach. Happy cooking!
Step 5: Preheat Your Equipment
Now, let’s talk preheating. It’s crucial, trust me. Whatever method you chose, be it grilling, pan-searing, or broiling, get that equipment nice and hot before the steak hits it. It’s like a warm-up before the big game!
For grilling, let it heat up for about 15 minutes on high. Pan-searing? Set your stove to medium-high and let the pan heat up for a couple of minutes. If you’re broiling, preheat your oven to the broil setting and let it warm up for around 10 minutes.
Pro tip: Use an oven thermometer to keep tabs on the temperature. Sometimes, equipment can be a little finicky, and you don’t want to risk overcooking your masterpiece. Alright, your equipment is hot and ready to go, so let’s get searing!
Step 6: Sear the Steak
Searing is the ticket to a delectable crust and locks in those tasty juices. Here’s how you nail it. For grilling, place the steak on the hottest part of the grill. You’ll hear a satisfying sizzle! Cook each side for 2-3 minutes, just enough to get those dreamy grill marks.
If pan-searing, add a smidge of oil to your hot pan. Lay the steak down (sizzle time!) and cook for 2-4 minutes per side, depending on the thickness. You want a nice, deep brown crust.
Broiling? Set your steak on a broiler pan or a wire rack over a baking sheet. Pop it in the oven, close to the broiler element, and cook for 3-5 minutes per side. Keep a close eye on it to avoid overcooking.
No matter the method, remember to flip only once. No one likes a fussy flipper! And there you have it, a beautifully seared steak. But we’re not done yet, so stay tuned for the next step!
Step 7: Cook to Desired Doneness
Alrighty, time to cook that steak just how you like it! Doneness is all about preference, so let’s talk levels: rare, medium-rare, medium, and so on. Here’s a quick rundown: rare is cool in the center, medium-rare’s a bit warmer, medium’s got a warm, pink center, and well-done is, well, no pink at all.
Use a meat thermometer to check the temperature. Aim for these numbers: 120°F for rare, 130°F for medium-rare, 140°F for medium, and 150°F for well-done. If you’re a pro, try the touch test! Poke the steak with your finger; the firmer it is, the more done it is. It’s a handy trick!
Keep in mind that cooking times vary depending on the method and steak thickness. So, stay vigilant and trust your instincts. Once it’s done to your liking, let’s move on to basting!
Step 8: Baste with Butter and Herbs
Who doesn’t love extra flavor? Basting is optional, but oh-so-worth it. Melt a few tablespoons of butter in a pan or directly on the grill. Then toss in some fresh herbs like rosemary, thyme, or even garlic. Give it a good stir, and let the magic happen.
If you’re pan-searing, just tilt the pan and spoon that glorious butter mixture over the steak for a minute or two. Grilling? No worries! Use a brush to baste the steak while it’s still on the grill. If you’re broiling, pull the steak out, baste, and pop it back in for a minute or two to let the butter seep in.
Your kitchen will smell divine, and your taste buds will thank you. Now, let’s let that steak rest.
Step 9: Let the Steak Rest
Patience, my friend! The resting step is key. Letting the steak rest allows the juices to redistribute, making every bite tender and oh-so-juicy. If you slice it too soon, you’ll lose all that goodness, and nobody wants that.
Place the steak on a cutting board or plate and cover it loosely with aluminum foil. Wait for about 5-10 minutes, depending on the thickness of the steak. The perfect time to whip up a side dish or set the table!
And that’s it! You’ve cooked the perfect steak. Now, all that’s left is to slice, serve, and enjoy your culinary masterpiece. Bon appétit!
Step 10: Slice and Serve
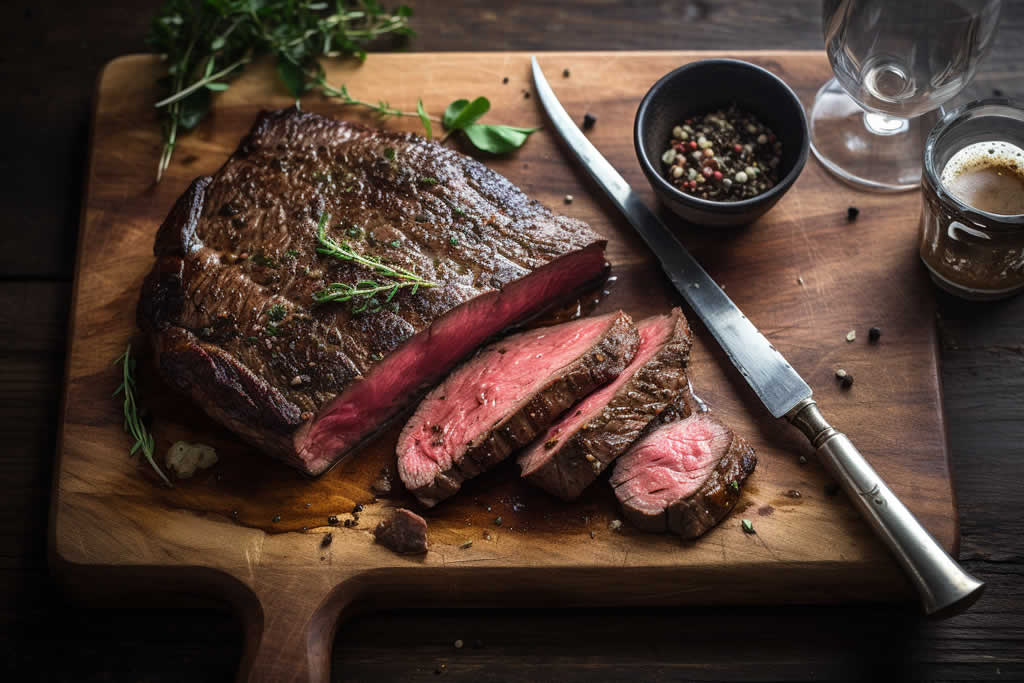
Yay, you’ve made it to the final step! It’s time to slice up that mouthwatering steak and enjoy. But wait, let’s talk about the best way to cut it. You see, slicing against the grain (that’s the muscle fibers) is super important. It’ll make your steak way more tender and enjoyable.
Grab a sharp knife and check the direction of the grain. Hold the knife at a slight angle and cut thin, even slices. Now you’re ready to plate it up! Serve your steak with scrumptious sides like baked potatoes, steamed veggies, or a simple salad. Want to go the extra mile? Whip up a tasty sauce, like a creamy peppercorn or tangy chimichurri. Dinner is served!
Conclusion
So there you have it, the ultimate guide to cooking the perfect steak in 10 easy steps! From choosing the right cut and prepping it to searing, cooking, and letting it rest, you’re now a steak master. Remember, practice makes perfect, so don’t be afraid to experiment with different cooking methods and seasonings. Soon, you’ll find your own signature steak recipe that’ll have your friends and family drooling.