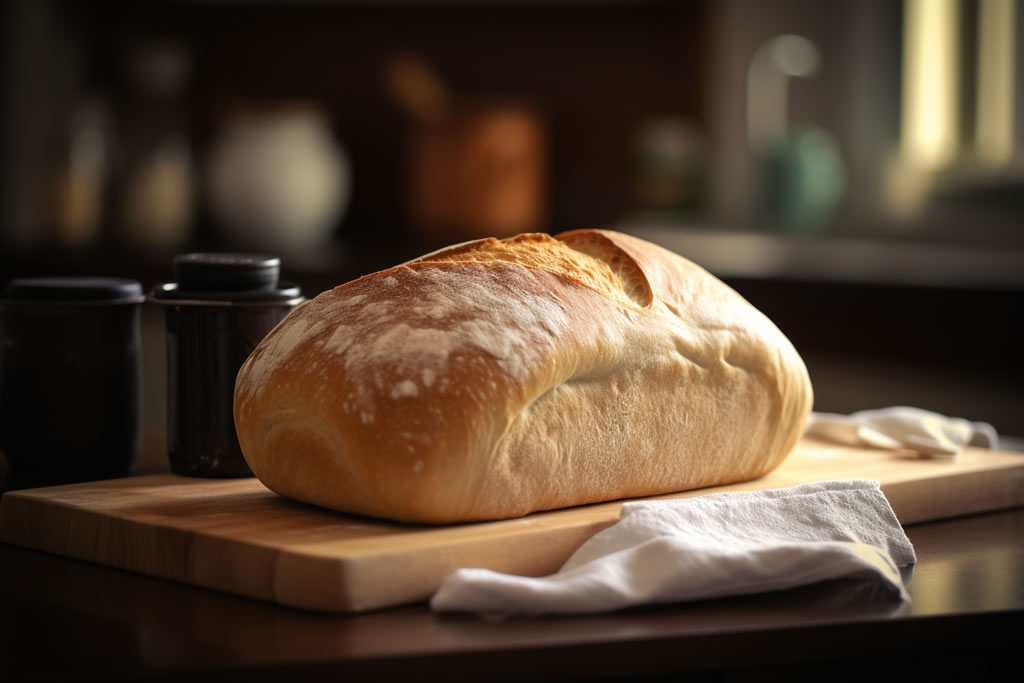
Hey there, fellow bread lovers! If you’re anything like me, you know there’s nothing quite like the smell of freshly baked bread wafting through your home. And, let’s be honest, store-bought bread just doesn’t compare. So, why not take a stab at making your own? It’s easier than you might think! Plus, there are tons of benefits to baking your own bread, like knowing exactly what’s in it (no weird additives!) and being able to customize it to your taste buds’ delight. In this article, we’ll walk you through five simple steps to create your very own homemade bread. Trust me, once you start, you’ll never go back!
Step 1: Gather Your Ingredients
Ready to get started? Let’s talk about the ingredients you’ll need to whip up a delicious loaf of homemade bread. Don’t worry; the list is pretty short and sweet! At the most basic level, you’ll need just four things: flour, water, yeast, and salt. That’s it! Now, there are other ingredients you can add to your bread for some extra pizzazz, like sugar, milk, or even seeds (think sesame or sunflower). Feel free to get creative here, but remember, simple is often best.
As for flour, you’ve got a few options. All-purpose flour is, well, all-purpose and works great for most bread recipes. But if you want to mix things up, you can try using bread flour (which has a higher protein content and can make your bread chewier) or even whole wheat flour for a more rustic, hearty loaf. Whatever type of flour you choose, just make sure it’s fresh and high-quality; it’ll make all the difference in your final product.
So, gather up those ingredients, and let’s move on to the next step. Homemade bread, here we come!
Step 2: Prepare the Dough
Alright, you’ve got your ingredients all lined up, and you’re ready to dive into making the dough! This part might seem intimidating, but trust me, it’s not as hard as it looks. So, roll up your sleeves and let’s get started.
First up, mixing! Grab a large bowl and pour in your flour, creating a little well in the center. Into that well, add your water and yeast (pro tip: make sure your water is warm, but not hot, to help activate the yeast). Add in your salt, and if you’re using any optional ingredients like sugar or seeds, toss those in now too. Then, using a wooden spoon or your hands, mix everything together until it forms a shaggy dough.
Now it’s time for kneading. This part is crucial, as it helps develop the gluten in the dough, giving your bread its structure and chewiness. Sprinkle some flour on a clean countertop and plop your dough down. Start kneading by pressing the dough with the heel of your hand and then folding it over onto itself. Keep going for about 10 minutes, or until the dough becomes smooth and elastic. If it feels too sticky, add a little more flour.
Once you’re done kneading, it’s time for the first rise. Shape your dough into a ball and place it in a greased bowl, covering it with a clean cloth or plastic wrap. Let it rest in a warm spot for 1-2 hours, or until it has doubled in size.
See, that wasn’t so bad, right? In the next steps, we’ll learn how to shape, bake, and enjoy your homemade bread. But for now, let your dough rise and get ready for the next phase of your bread-making adventure!
Step 3: Shape Your Bread
Now that your dough has risen, it’s time for some fun: shaping your bread! In this step, you’ll learn how to create different types of bread, like loaves, rolls, and baguettes. You’ll also discover how scoring your bread can help it bake evenly and beautifully. Ready? Let’s get to it!
Begin by punching down your dough to release any air bubbles. Then, remove the dough from the bowl and place it on a lightly floured surface. Decide what type of bread you want to make: a loaf, rolls, or maybe even a baguette. For a loaf, shape the dough into an oval or rectangle and place it into a greased loaf pan. If you’re making rolls, divide the dough into equal portions and roll each piece into a smooth ball. For a baguette, roll the dough into a long, skinny log.
Next up is scoring, which means making small cuts on the surface of your shaped dough. This helps control the expansion of the bread as it bakes, allowing it to rise evenly. Use a sharp knife or a special tool called a bread lame to make shallow slashes on the top of your dough. Get creative with your patterns!
After shaping and scoring, it’s time for the second rise. Place your dough on a parchment-lined baking sheet or in a loaf pan, and cover it with a clean cloth. Allow it to rise in a warm spot for about 30 minutes to an hour, or until it has nearly doubled in size.
You’re almost there! In the next step, you’ll learn how to bake your bread to perfection. So, take a breather and get ready to enjoy the heavenly aroma of homemade bread wafting through your kitchen!
Step 4: Bake Your Bread
Alright, we’ve made it to the moment of truth: baking your bread! In this step, we’ll discuss preheating your oven, preparing the baking surface, and finding the right temperature and time for your bread. Plus, we’ll share some tips for getting that ideal crispy crust and soft interior. Excited? Let’s dive in!
First things first, preheat your oven. The temperature will depend on the type of bread you’re baking, but most recipes call for around 350-450°F (175-230°C). While the oven heats up, make sure to prepare the baking surface. You can use a baking sheet, pizza stone, or even a cast-iron skillet. Just remember to line it with parchment paper or sprinkle it with cornmeal to prevent sticking.
Now, let’s talk about baking time and temperature. Like we mentioned earlier, the specifics will vary depending on your recipe, but here are some general guidelines:
- For a standard loaf, bake at 350-375°F (175-190°C) for about 25-35 minutes.
- For rolls, bake at 375-400°F (190-205°C) for 15-20 minutes.
- For a baguette, bake at 450°F (230°C) for about 20-25 minutes.
Keep an eye on your bread while it’s baking, and don’t be afraid to adjust the time and temperature as needed.
To achieve a crispy crust and soft interior, try adding a bit of steam to your oven. Just place a heatproof dish filled with water on the bottom rack, and the steam will work its magic. Alternatively, you can spritz the inside of the oven with water a few times during the first few minutes of baking.
Whew, that’s a lot of info! But trust us, once you’ve got these basics down, you’ll be a bread-baking pro in no time. Stay tuned for the final step, where we’ll talk about cooling and enjoying your homemade bread!
Step 5: Cool and Enjoy
Yay, you did it! You’ve baked your very own homemade bread! But hold on, we’ve got one more step before you can dig in. Cooling your bread is super important, so let’s talk about why and how to do it properly.
First off, why cool your bread before slicing? Simple: it helps maintain the bread’s structure and texture. Cutting into hot bread can cause it to become dense and gummy. So, once your bread is out of the oven, let it cool on a wire rack for at least 20-30 minutes (longer for larger loaves). The air circulation will prevent the crust from getting soggy, and your patience will be rewarded with perfect slices.
Now, let’s chat about storing your homemade bread. To keep it fresh and tasty, store it in a cool, dry place, like a bread box or even a paper bag. Avoid using plastic bags, as they can trap moisture and make your bread go stale faster. If you can’t finish your bread within a few days, consider freezing it. Just wrap it tightly in plastic wrap and pop it in the freezer. When you’re ready to enjoy it, thaw it at room temperature, and it’ll be as good as new!
Finally, let’s talk about ways to enjoy your bread. The possibilities are endless! Toast it for breakfast, make a scrumptious sandwich, or serve it alongside your favorite soup or salad. You can even use it as a base for homemade croutons or breadcrumbs!
So, there you have it – the final step to homemade bread bliss. With these tips in your back pocket, you’re all set to impress your friends and family with your newfound baking skills. Happy baking!
Conclusion
So, there you have it, folks! Making homemade bread is a piece of cake – or should I say, a slice of bread – when you follow these 5 simple steps. Just remember to gather your ingredients, prepare the dough, shape your bread, bake it, and finally, cool and enjoy.
Don’t be afraid to mix things up and experiment with different recipes, techniques, and flavors. Trust me, your taste buds will thank you! And the best part? Sharing your fresh, warm, homemade bread with friends and family. There’s nothing quite like the joy of seeing their faces light up as they take a bite of your delicious creation.
So, go on! Put on your apron, roll up your sleeves, and get ready to rock the baking world. Your journey into the wonderful world of bread-making starts now.